To create a booking page that actually gets used, make the page easy to understand in the first few seconds. Clients should know who you are, what they can book, how long it takes, when you are available, what it costs, and what happens after they submit. A good booking page removes uncertainty before it asks for commitment.
Start with the client decision
A booking page is not just a calendar. It is a decision page. A client is trying to decide whether they trust you, which service fits their need, and whether the available times work. If the page does not answer those questions, clients leave or send another message instead of booking.
Before editing design or colors, decide what the page should help clients do. A cleaner may want clients to book a standard cleaning. A photographer may want portrait inquiries. A tutor may want trial sessions. A contractor may want estimate requests. One clear goal makes the page easier to write and easier to use.
Use a clear page name and booking URL
Your booking URL should be short enough to share and recognizable enough to trust. Use your business name, personal brand, or a simple version of your service. Avoid random words, long strings, or internal nicknames that clients will not recognize.
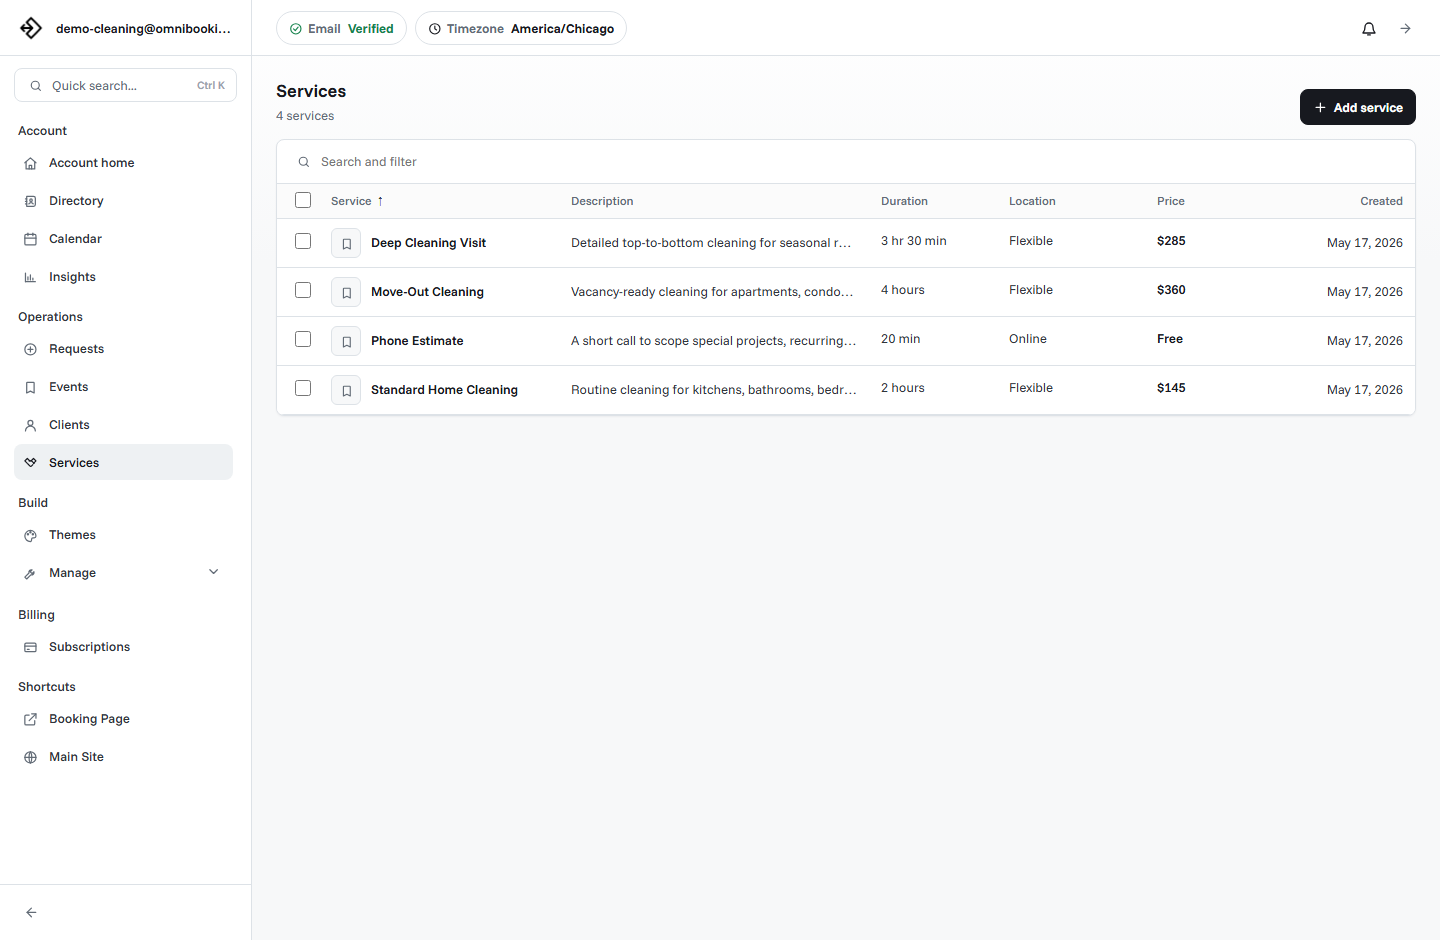
Write service options clients understand
Service names are one of the biggest conversion points on a booking page. Clients should not have to decode your internal terminology. Use service names that match what people ask for.
Good service names
Consultation, Deep Cleaning, Family Portrait Session, Private Training, Math Tutoring, Repair Estimate.
Weak service names
Package A, Standard Option, Session 1, General Service, Basic Visit, Custom Slot.
Helpful descriptions
Explain who the service is for, what is included, how long it takes, and what the client should prepare.
Show realistic availability
A booking page only works if the available times are accurate. Do not open every hour just because the software allows it. Set the schedule you can actually serve, then block breaks, travel time, admin time, and days you do not want appointments.
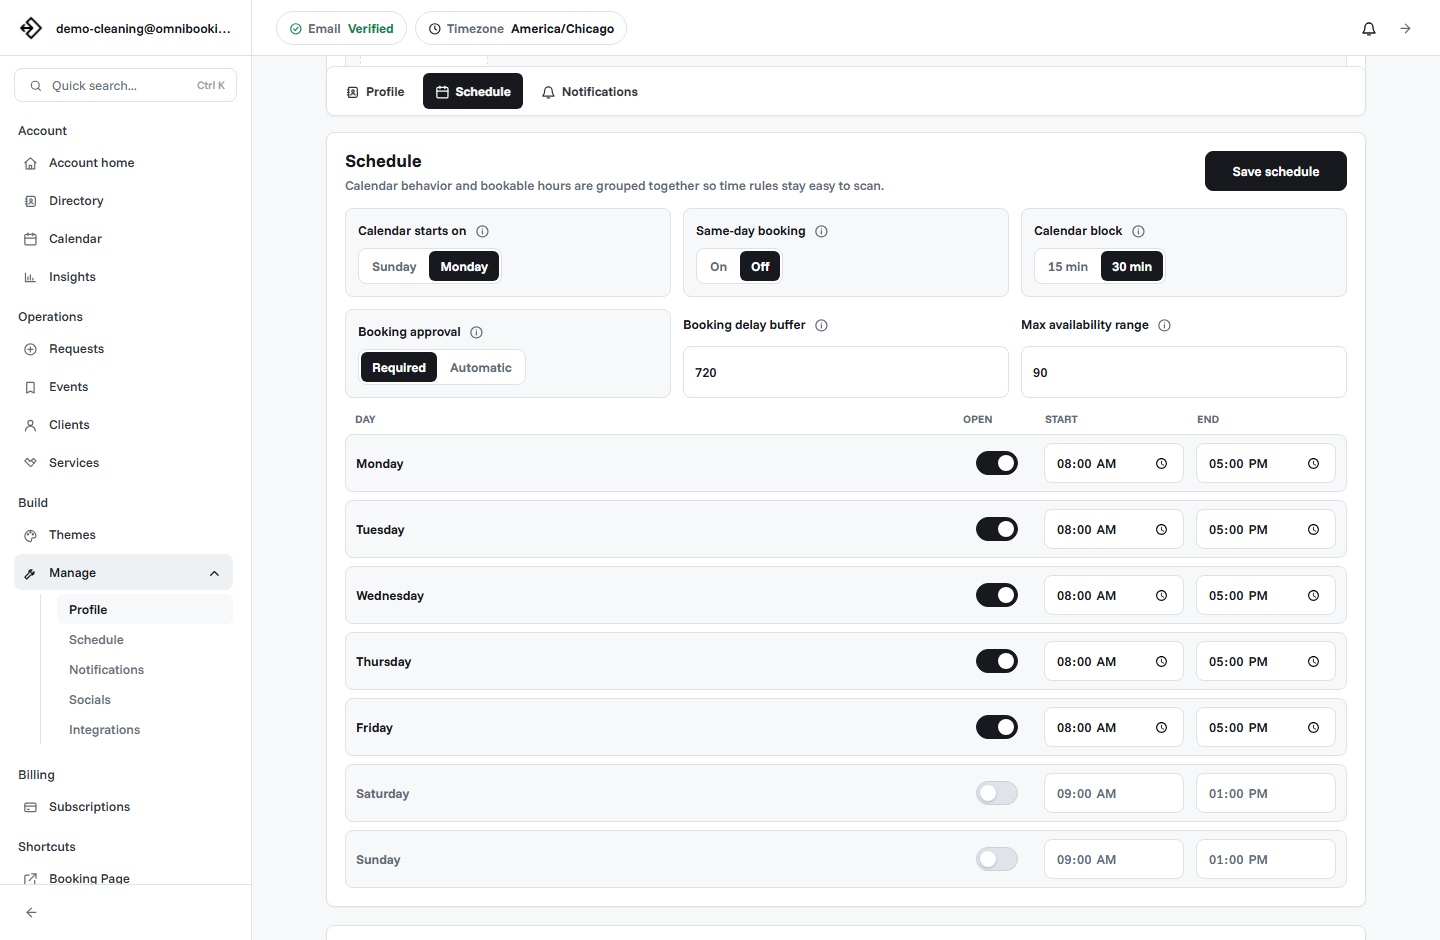
- Correct timezone.
- Open days and closed days.
- Start and end times for each working day.
- Service duration for each appointment type.
- Breaks, buffers, or blocked time.
- Booking delay for same-day or last-minute appointments.
- Maximum booking range for future appointments.
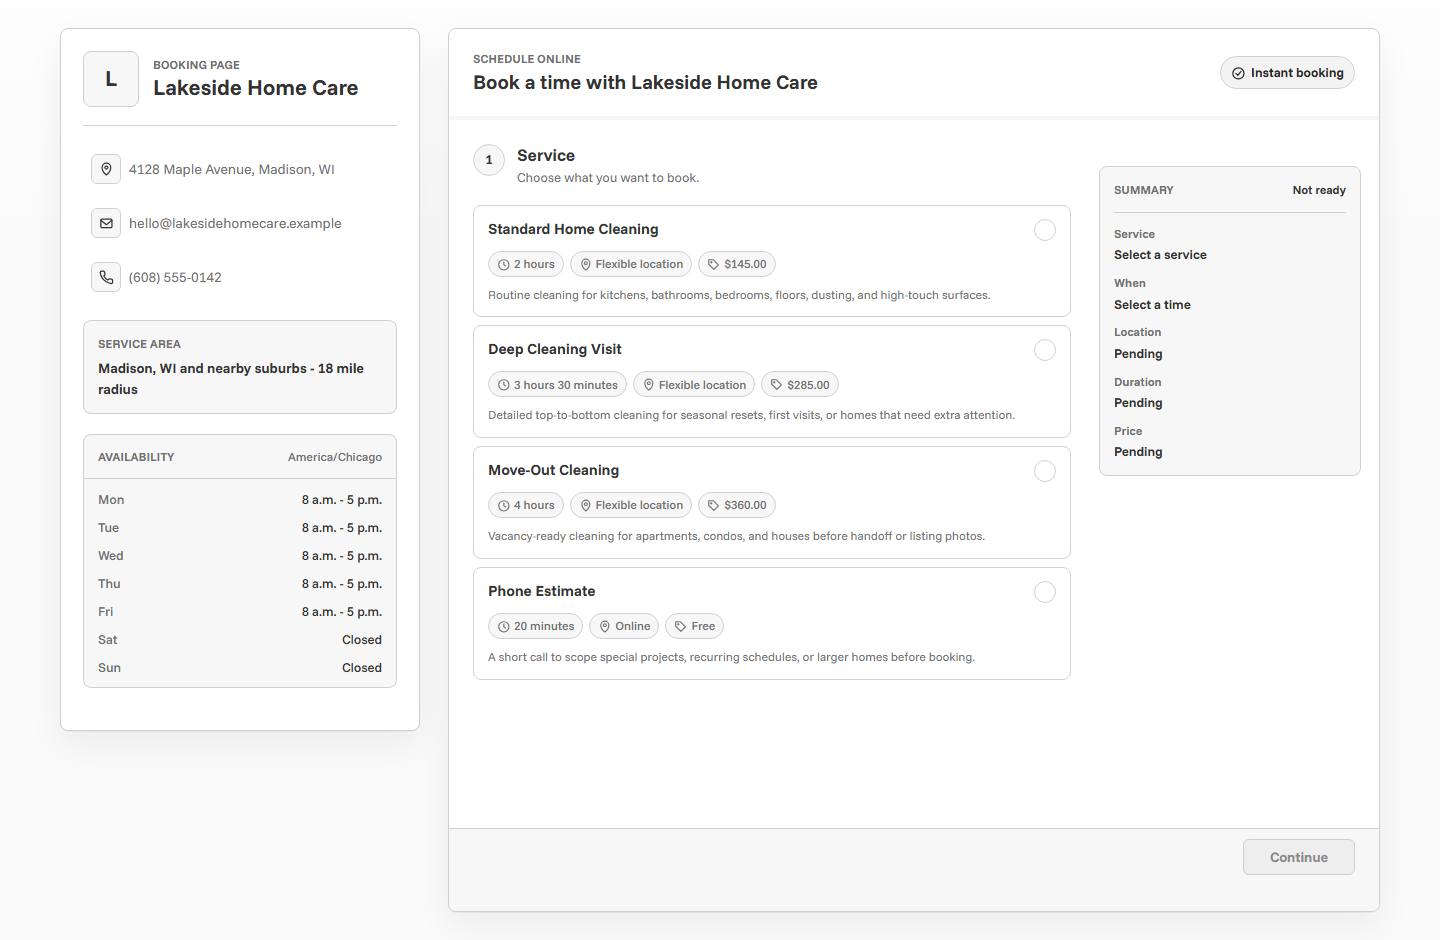
Add trust signals before the booking form
Clients are more likely to book when the page feels connected to a real business. Add the details that reduce hesitation: business name, logo, service area, contact email, phone number when appropriate, and descriptions that sound like your actual offer.
Trust signals do not need to be dramatic. A clear business name, accurate service details, and a simple confirmation process are often enough to make the page feel reliable.
Decide whether to require payment
Payment is useful when the appointment requires commitment. Deposits and paid bookings can reduce no-shows, protect limited time slots, and make the booking feel more serious. They are not required for every business, though.
Use payment for fixed-price services, consultations, sessions, classes, or appointments where the client should pay before the time is reserved. If pricing depends on scope, use the booking page to collect details and follow up with a quote.
Omnibooking supports paid booking through Stripe Connect. The Stripe Connect setup guide explains how to connect payments and turn on paywalls for fixed-price services.
Make the next step obvious
A client should know what happens after they submit the booking. Will they receive an email? Is the booking confirmed immediately? Does the owner review requests first? Do they need to pay? Clear next steps reduce follow-up questions and make the booking page feel professional.
Test the page before sharing it
Testing is where many booking page problems show up. Open the page on your phone. Pretend you are a new client. Choose a service, pick a time, enter details, and confirm the page makes sense without extra explanation.
Pay attention to friction: unclear service names, missing prices, no available times, wrong timezone, confusing confirmation language, or a page that does not feel connected to your business.
How to create a booking page in Omnibooking
- Create or verify your account. Use the email address you want connected to your business.
- Add your booking page basics. Set your business name, booking URL, timezone, contact details, and logo.
- Create services. Add clear names, durations, prices, descriptions, and location details.
- Set availability. Open the days and hours you want clients to book, then add realistic schedule rules.
- Preview the page. Test the client flow before sharing it publicly.
- Share the link. Add it to your website, social profiles, email signature, text templates, and QR codes.
For a broader setup walkthrough, see Getting Started with Omnibooking.
Related resources
Booking Page Examples
Borrow practical page patterns for photographers, cleaners, tutors, stylists, and more.
Online Booking Checklist
Use the checklist to review the page before putting it in front of clients.
Set Booking Availability
Make sure the booking page only shows times you can actually serve.
Reduce No-Shows With Reminders
Add the confirmation and reminder workflow after the page is ready.
FAQs
What should be on a booking page?
A booking page should include a business name, clear services, service durations, prices when useful, available times, contact collection, confirmation details, and a simple path to book.
How many services should I list?
Start with the services clients request most often. Three to six clear services are usually better than a long list of overlapping options.
Should a booking page show prices?
Show prices when the service is fixed-price or when pricing helps clients choose. If pricing depends on scope, explain that the booking starts a quote or consultation process.
How do I get more clients to use my booking page?
Put the link where clients already contact you: website buttons, social profiles, pinned posts, email signatures, text templates, QR codes, and follow-up messages.
Why are clients not booking from my page?
Common reasons include unclear service names, no convenient times, missing trust details, confusing prices, or uncertainty about what happens after submitting.